
The Maker's Guide to Fiber Laser DIY Systems
Fiber laser technology, once exclusive to industrial use, is now increasingly available for DIY projects. This presents exciting new opportunities for makers and hobbyists to harness the precision and power of fiber lasers right in their workshops. But what makes this technology so attractive for DIY?
Why Choose Fiber Laser for DIY?
Fiber lasers offer several distinct benefits over traditional laser types like CO2 lasers. They possess a higher power density, allowing for more precise and faster engraving and marking. Fiber lasers also tend to be more compact and portable, ideal for home workshops.
Plus, they typically require less maintenance than CO2 lasers. This combination of power, portability, and ease of maintenance makes fiber lasers an excellent choice for the DIY enthusiast.
The growing interest in fiber lasers extends beyond hobbyists. The global fiber laser market is expanding rapidly. Valued at $3.3 billion in 2022, it is projected to reach $9.2 billion by 2032, with a CAGR of 11%. This growth is fueled by the increasing adoption of fiber lasers in industries like automotive, aerospace, and electronics. You can explore more about this trend at Allied Market Research. This market expansion points to a bright future for fiber laser DIY applications.
Understanding the Core Components
Building a DIY fiber laser system involves understanding its key parts. These typically include a laser diode, fiber optic cable, focusing lens, and a control system.
The laser diode generates the light, which the fiber optic cable transmits to the focusing lens. This lens then focuses the laser beam onto the material being processed. A control system, often using a microcontroller like an Arduino or Raspberry Pi, manages the laser's operation.
For further research on DIY fiber laser resources, diyfiberlaser.com might offer some helpful information.
Choosing the Right Components for Your Project
Selecting the right components is key for optimal results. The power output of the laser diode, for example, directly impacts the cutting and engraving capabilities.
The core diameter and numerical aperture of the fiber optic cable influence beam quality and focusing. Careful component selection ensures your DIY system aligns with your project’s needs, including essential safety equipment.
Planning for Success
Successful DIY fiber laser projects start with meticulous planning. This includes creating a safe enclosure, providing proper ventilation, and selecting high-quality components.
These steps create the foundation for a safe and satisfying experience. Careful planning helps maximize performance and ensures the system's longevity. With the right preparation, a DIY fiber laser system can become a valuable tool for creative projects and precise fabrication.
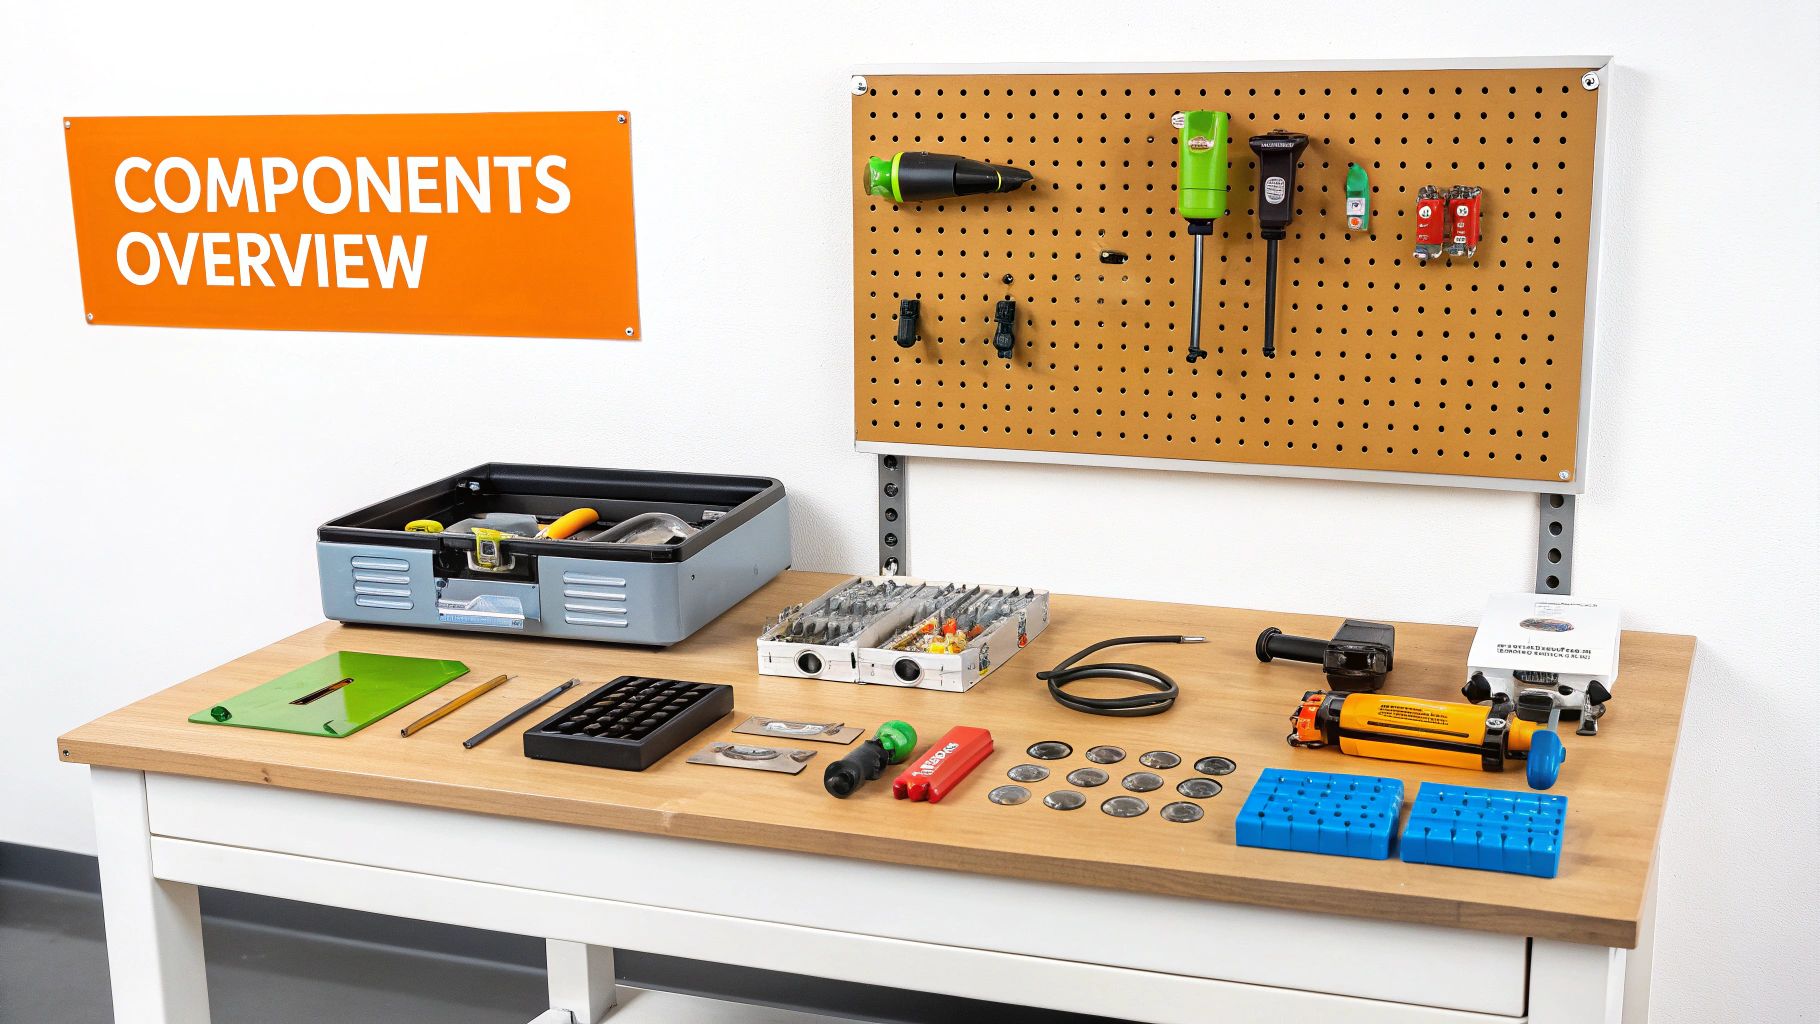
Essential Components: Building Your Fiber Laser DIY Arsenal
Building a DIY fiber laser system is like assembling a high-performance computer. Each component plays a vital role in the final result. Careful selection and a good understanding of each part's function are crucial for a successful build. Let's dive into the essential components you'll need.
The Heart of the System: Laser Diode
The laser diode is the core of your fiber laser. It's the component that generates the light used for engraving or marking. Two key factors to consider when choosing a laser diode are power output (measured in watts) and wavelength (measured in nanometers). Higher wattage allows for deeper engravings and faster processing. The wavelength determines which materials you can mark. For many DIY projects, a 20-50 watt diode is a great starting point. For those interested in learning more about laser setup, this resource might be helpful.
Guiding the Light: Fiber Optic Cable
The fiber optic cable carries the light generated by the laser diode to the focusing lens. Pay close attention to the core diameter and numerical aperture (NA). The core diameter impacts beam quality, and the NA affects how efficiently light travels through the cable. Choosing the correct cable minimizes power loss and ensures a sharp, focused beam.
Focusing the Power: Focusing Lens
The focusing lens concentrates the light from the fiber optic cable onto your target material. The focal length determines the laser beam's spot size. A shorter focal length gives you a smaller, more intense spot, perfect for detailed work like engraving jewelry. A longer focal length creates a larger spot, suitable for marking broader surfaces.
Controlling the Process: Control System
Think of the control system as the brains of your fiber laser. It manages the entire operation. Typically, this involves a microcontroller, like an Arduino or Raspberry Pi, and software to control it. With the control system, you can adjust power, manage scanning patterns, and even automate tasks.
Before we discuss sourcing components, let's look at a table summarizing the essential components for a DIY fiber laser:
Introduction to the Table: The following table, "Essential Fiber Laser DIY Components," provides a breakdown of the key components you'll need for your build. It includes functions, specifications, estimated costs, and potential sources.
| Component | Function | Specifications to Look For | Estimated Cost Range | Common Sources |
|---|---|---|---|---|
| Laser Diode | Generates the laser light | Power (Watts), Wavelength (nm) | $50 - $500+ | Specialized laser suppliers |
| Fiber Optic Cable | Transmits laser light | Core Diameter, Numerical Aperture (NA) | $20 - $100+ | Fiber optic suppliers, online retailers |
| Focusing Lens | Focuses the laser beam | Focal Length | $10 - $50+ | Optical suppliers, online retailers |
| Control System | Manages laser operation | Microcontroller type, Software compatibility | $30 - $200+ | Electronics suppliers, online retailers |
Key Insights from the Table: As shown in the table, the cost of components can vary depending on specifications and sourcing. While some components might require specialized vendors, others are readily available from common electronics suppliers.
Sourcing Your Components: Smart Strategies
Sourcing components can be strategic. While specialized vendors are necessary for some items like the laser diode and fiber optic cable, other components, like those for the control system, can often be found at standard electronics suppliers. This can help manage your project budget. The fiber laser market is growing rapidly. Valued at USD 6.94 billion in 2023, it's projected to reach USD 17.04 billion by 2032, with a CAGR of 10.5%. This growth, documented here, suggests increasing component availability and potentially lower costs.
Ensuring Compatibility: A Key Consideration
Compatibility is key when building your system. Make sure your laser diode's wavelength matches your fiber optic cable's capabilities. Double-check that the focusing lens is suitable for your chosen wavelength and desired focal length. Careful planning and component selection will ensure a successful and effective fiber laser system.
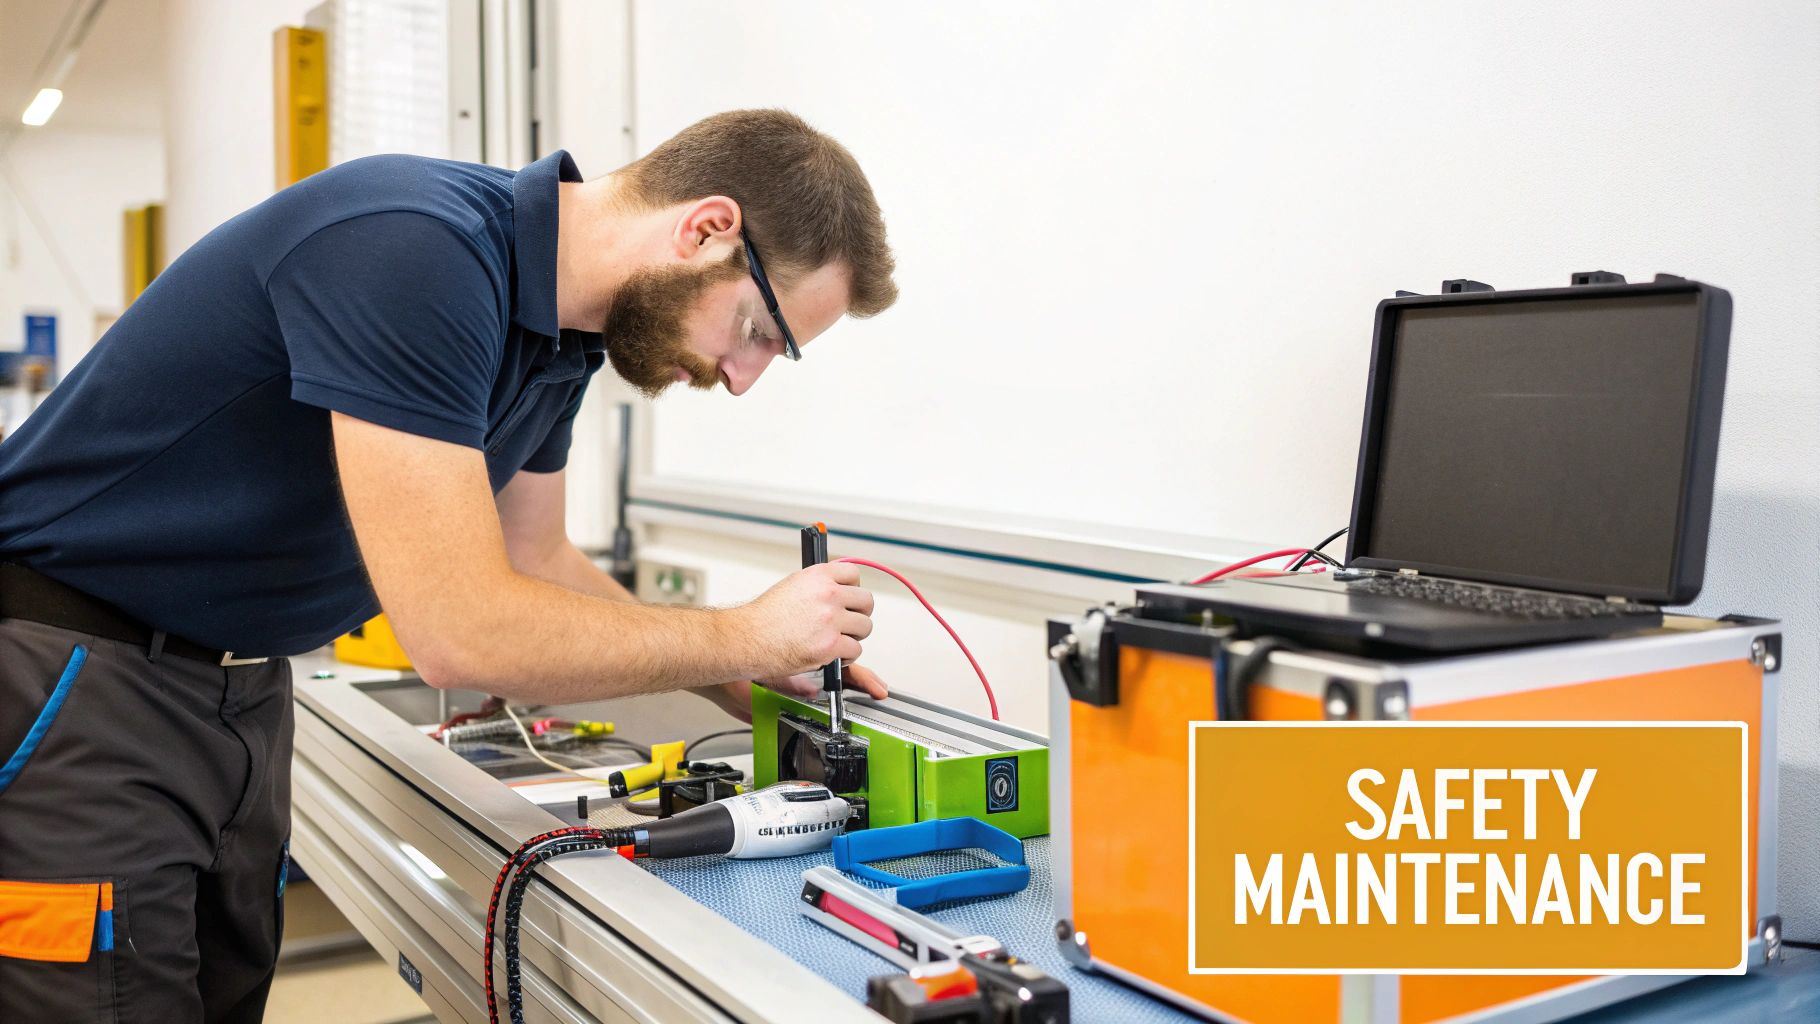
Safety First: Protecting Yourself During Fiber Laser DIY
Building your own fiber laser system can be incredibly satisfying, but safety should always be your top priority. Working with lasers, particularly fiber lasers with their concentrated power, demands careful consideration of potential hazards and implementing strong safety protocols. This ensures a safe and enjoyable DIY experience.
Understanding the Risks of Fiber Laser DIY
Fiber lasers, while becoming more accessible, are powerful tools that require respect. The intense beams they generate can cause significant harm, including eye injuries, skin burns, and fire hazards. Understanding these risks is the first step to mitigating them. Even a momentary, accidental exposure to the laser beam can result in permanent vision loss.
Essential Safety Equipment for Fiber Laser DIY
Protecting yourself starts with the right safety gear. Laser safety glasses designed for the specific wavelength of your fiber laser are crucial. It's important to remember that not all laser glasses are the same, and using the wrong type can provide inadequate protection. Fire-resistant gloves and clothing are also essential to minimize burn risks.
Designing a Safe Enclosure for Your Fiber Laser
A secure enclosure is paramount to contain the laser beam and prevent accidental exposure. This enclosure should be constructed from non-flammable materials and fitted with interlocks that automatically shut down the laser if opened. A well-designed enclosure protects you and the surrounding workspace. This allows you to concentrate on your project without constant safety concerns. For more detailed information on laser setup, you can refer to this helpful guide: laser setup.
Implementing Emergency Systems
Adding emergency systems provides an additional layer of safety. An easily accessible emergency stop button allows for immediate shutdown of the laser in case of an incident. A fire extinguisher specifically designed for laser fires is also an absolute necessity.
Legal and Regulatory Considerations
Before beginning any fiber laser DIY project, research local regulations concerning laser ownership and operation. These regulations often differ depending on the laser's power and intended application. Understanding these legal requirements ensures compliance and avoids potential penalties. Keeping up-to-date with best practices within the laser community can also enhance your own safety measures.
Fiber lasers play an increasingly important role in various industries. The global fiber laser market reached USD 3.0 billion in 2024 and is projected to reach USD 6.1 billion by 2033, showing a CAGR of 7.8%. Learn more about this growing market here. This expansion is fueled by demand from sectors like aerospace and automotive. While DIY projects represent a small part of this market, greater accessibility is enabling more individuals to explore fiber laser technology.
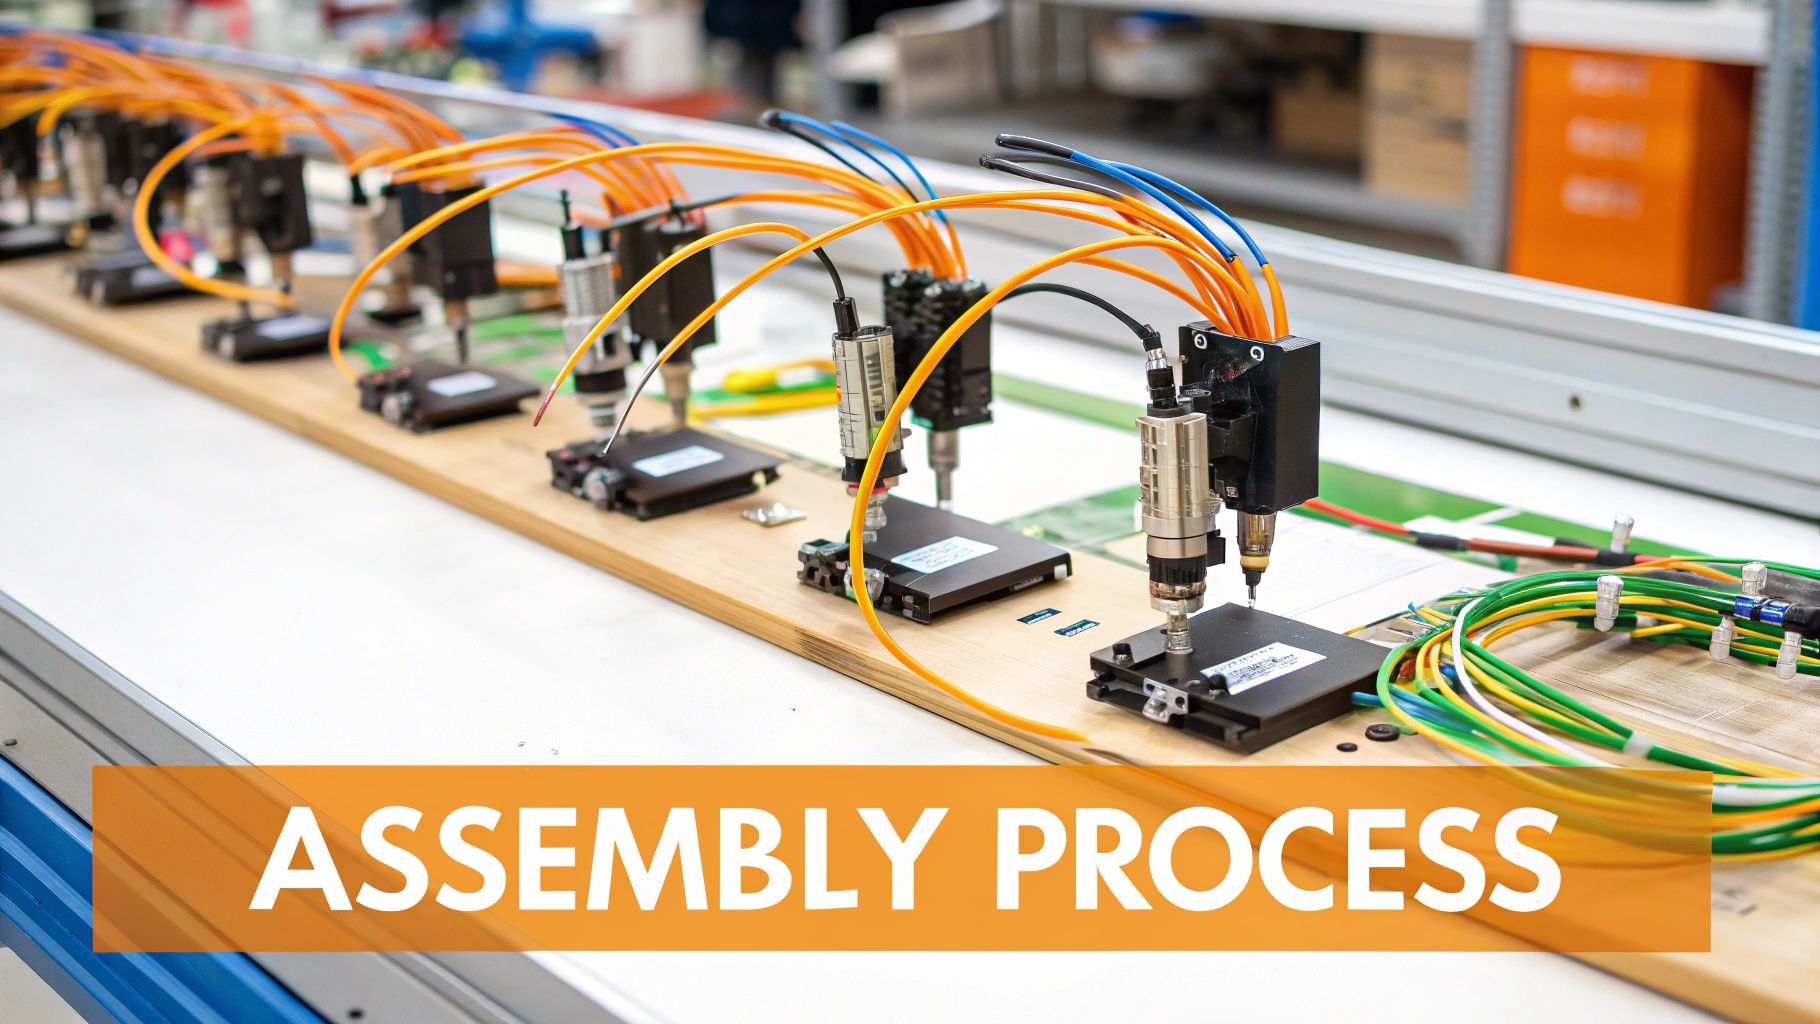
The Builder's Blueprint: Assembling Your Fiber Laser DIY
Building a working fiber laser from a collection of parts requires careful planning and execution. This guide offers a step-by-step approach, borrowing from the wisdom of experienced DIY fiber laser builders. This blueprint will empower you to navigate the assembly process confidently.
Planning Your Layout: The Foundation of a Successful Build
Before even touching a screwdriver, meticulous planning of your system layout is essential. Think about the position of each component: the laser diode, the path of the fiber optic cable, the focusing lens assembly, and the control system. This upfront planning prevents costly revisions later. It's like architectural design – a strong blueprint is fundamental.
Mounting the Laser Diode: Precision and Stability Are Key
The laser diode is the core of your laser system, demanding secure and stable mounting. Use appropriate mounts to minimize vibrations and ensure consistent performance. Incorrect mounting can destabilize the beam, impacting the precision of your engravings. Imagine trying to write neatly with a shaky hand – precise lines become nearly impossible.
Connecting the Fiber Optic Cable: Handling with Care
Connecting the fiber optic cable demands a gentle approach. Carefully insert the cable into both the laser diode module and the focusing lens assembly. Ensure a secure, dust-free connection. Damage to this cable can drastically reduce power output and beam quality. Think of a kink in a garden hose restricting water flow; a damaged fiber optic cable similarly restricts light transmission.
Securing the Focusing Lens: Achieving Optimal Focus
The focusing lens requires secure mounting and precise alignment. Employ adjustable mounts to fine-tune the focal point for your specific needs. Precise focus is paramount for sharp, clean engravings. This is like adjusting a camera lens – the right focus is crucial for a crisp image.
Integrating the Control System: The Brains of the Operation
Connect the control system to the laser diode driver and other components as instructed by your chosen software and hardware. This step integrates the control system, the “brains” of the operation, with the laser itself. Correct wiring and grounding are critical to prevent electrical hazards and ensure reliable performance. This is comparable to connecting a computer’s peripherals; correct connections are essential for functionality.
Cooling Considerations: Preventing Overheating
Fiber lasers generate heat, so effective cooling is vital to prevent component damage. Implement a cooling system – air-cooled or water-cooled – based on your laser's power and usage. Adequate cooling extends the system's life and maintains its performance. Think of a car engine; without a cooling system, it would overheat and fail.
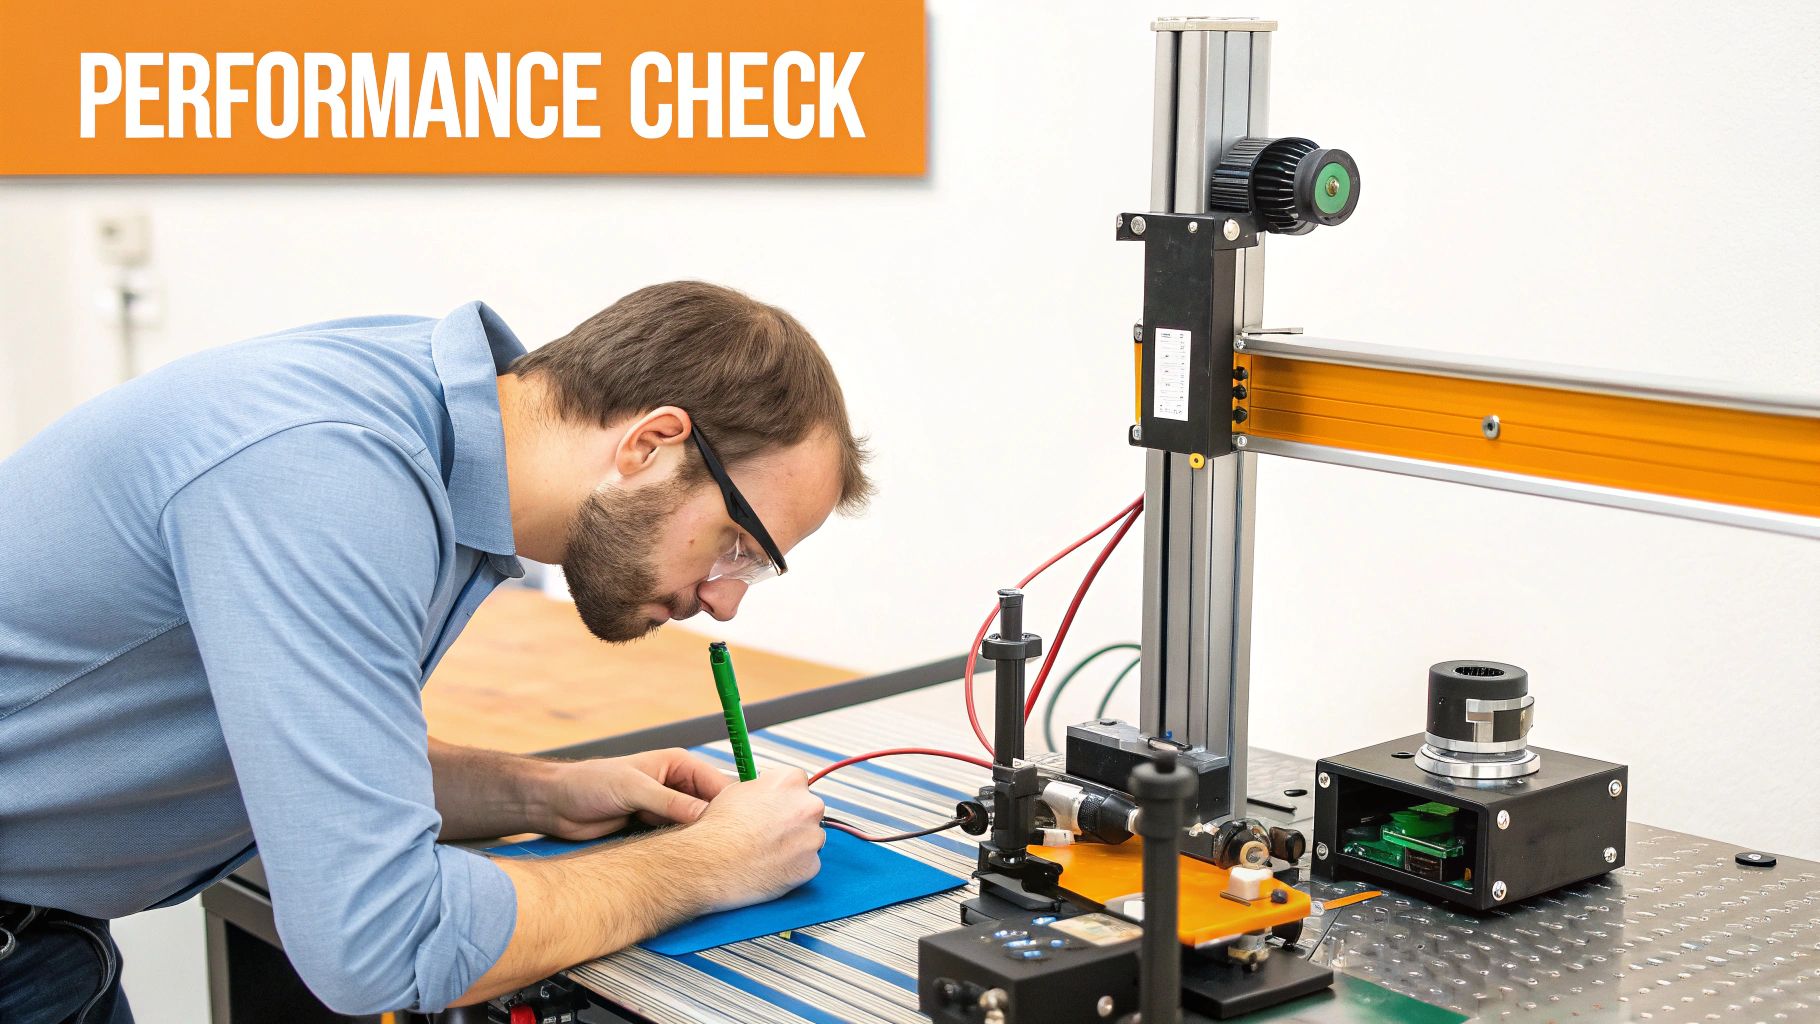
Testing and Calibration: Ensuring Precision and Performance
After assembling the main components, conduct thorough testing and calibration. Use test materials to confirm beam alignment, power output, and engraving quality. Methodical testing ensures correct operation and helps identify potential problems early. This is similar to tuning a musical instrument; precise adjustments are essential for perfect harmony.
Troubleshooting Common Issues: Quick Fixes for Common Problems
Even with careful assembly, issues can arise. Here are a few common problems and their solutions:
- Low Power Output: Check the fiber optic cable connections for damage or misalignment. Also, verify the laser diode driver settings and power supply.
- Poor Beam Quality: Inspect the focusing lens for cleanliness and alignment. Check the fiber optic cable for damage as well.
- Inconsistent Engraving: Make sure all components are securely mounted to minimize vibrations. Confirm the control system and software are functioning correctly.
By following these steps and utilizing the troubleshooting tips, you can build a powerful and precise fiber laser system from individual components. Remember, patience and attention to detail are crucial for a successful outcome. With some effort, you can create a high-quality fiber laser system that will last for years.
Bringing Your Fiber Laser DIY System to Life With Software
The hardware for your DIY fiber laser system is just the beginning. The software that controls it is equally important, acting as the brains behind the laser's power and accuracy. Picking the right software and setting it up correctly can determine whether your experience is filled with frustration or satisfying results.
Choosing The Right Control Software
Finding the right software involves balancing power and ease of use. Several commercial software packages are available, offering advanced features and reliable technical support. Skyfire is a popular choice known for its robust features and professional capabilities. However, these packages often come with a significant cost.
For those on a budget, open-source alternatives provide a cost-effective option. These often have a steeper learning curve but offer more flexibility for customization. The best choice depends on your budget, technical skills, and the level of control you need.
Programming Your Microcontroller
Whether you’re using an Arduino, a Raspberry Pi, or a dedicated microcontroller, programming is essential for controlling your fiber laser. This involves writing code that tells the laser how to move, how much power to use, and other key parameters. It’s like writing a detailed recipe for your laser to follow, ensuring each step is perfect.
User-Friendly Interface Design
An intuitive interface makes operation simpler and safer. Think about adding features like clear visual feedback, easy-to-understand controls, and built-in safety mechanisms. This is comparable to designing the dashboard of a car. A well-designed layout shows crucial information at a glance, improving both usability and safety.
Feedback Mechanisms: Enhancing Performance and Safety
Real-time feedback, like power monitoring and temperature sensors, is invaluable. These features give you insights into your system’s performance and allow you to adjust as needed. More importantly, they act as early warning systems, preventing potential issues like overheating. This preventative approach is like a car’s check engine light, alerting you to problems before they become serious.
Real-World Software Configurations
Learning from other builders’ successes is a great strategy. Looking at examples of successful software configurations provides valuable knowledge and inspiration. Some DIY builders share their custom Arduino code and interface designs online, which can be a great starting point for your project.
Open-Source Software Options: Exploring the Possibilities
Open-source software like GRBL and LaserWeb provide affordable control solutions. These platforms have active communities that offer support and resources, making them a good fit for those willing to put in the time to learn.
Commercial Software Packages: Professional-Grade Control
Commercial software offers a polished user experience and a wide range of features. While they come with a price, they can provide greater efficiency and more intuitive control. They're often a good choice for builders prioritizing ease of use and professional results. Choosing between open-source and commercial software involves balancing your budget and the features you need.
By carefully considering these software aspects, you’ll transform your fiber laser DIY system from a collection of parts into a powerful, precise, and safe tool. Remember, the software is as essential to your build as the physical components.
Putting Your Fiber Laser DIY System to Work
Now that your DIY fiber laser system is up and running, the exciting part begins: putting it to use! A DIY fiber laser opens up a world of creative and practical possibilities. Whether you're etching detailed designs onto metal jewelry or personalizing everyday items, the only limit is your imagination. It's all about exploring what your system can do and discovering new ways to utilize its precision.
Exploring the Potential of Your DIY Fiber Laser
DIY fiber lasers give makers the ability to create professional-quality products. Imagine etching intricate designs on metal, making custom signage, or even engraving tools with personalized markings. Projects that once required expensive commercial equipment are now within reach. Fiber lasers also enable artistic creation thanks to their precision and control. Think about creating detailed artwork on glass, personalizing gifts with custom engravings, or adding unique touches to metal sculptures. A fiber laser significantly enhances these artistic endeavors, transforming ordinary objects into personalized treasures.
Materials and Techniques: Unlocking the Magic
Different materials react differently to laser engraving. Metals such as stainless steel and aluminum etch beautifully, producing crisp, permanent marks. Glass, on the other hand, can be engraved with frosted designs or intricate patterns. Experimenting with different power levels and speeds on various materials is essential for achieving the desired results. This hands-on experience helps you learn how the laser interacts with each material. For instance, lower power settings are perfect for delicate engravings on glass, while higher power is needed for deeper marks on metal.
To illustrate the varying requirements for different applications, take a look at the comparison table below:
DIY Fiber Laser Applications Comparison: A comparison of various applications for DIY fiber lasers, including power requirements, material compatibility, and difficulty level.
| Application | Power Requirements | Compatible Materials | Complexity Level | Typical Results |
|---|---|---|---|---|
| Etching Jewelry | Low to Medium | Stainless steel, precious metals | Beginner to Intermediate | Fine lines, detailed patterns |
| Custom Signage | Medium | Wood, acrylic, anodized aluminum | Beginner | Clear text, logos, and designs |
| Tool Marking | Low | Stainless steel, hardened steel | Beginner | Permanent identification marks |
| Glass Engraving | Low | Glass, crystal | Intermediate | Frosted designs, intricate patterns |
| Metal Cutting (thin sheet) | High | Stainless steel, mild steel, aluminum | Advanced | Precise cuts, intricate shapes |
This table highlights the diverse applications of a DIY fiber laser and how adjusting settings and choosing the right materials can lead to different outcomes. Remember to always test on scrap material first to fine-tune your settings.
DIY vs. Commercial: Understanding the Differences
While DIY fiber lasers offer impressive capabilities, it's important to understand their limitations compared to commercial systems. Commercial systems typically have much higher power output, faster processing speeds, and advanced features like auto-focusing. However, for many hobbyists and small-scale projects, the power and precision of a DIY system are more than enough. It provides an affordable entry point into laser engraving. The fiber laser market is trending toward high-power lasers for industrial use. The global fiber laser market is projected to reach USD 12.7825 billion by 2034, up from about USD 4.304 billion in 2024. This represents significant growth with an 11.5% CAGR. More detailed statistics can be found here. Although DIY projects aren't a major part of this market, the increasing accessibility of the technology suggests potential growth in non-industrial applications.
Practical Applications and Creative Inspiration
Here are some exciting ways people are using DIY fiber lasers:
- Precision Metal Marking: Creating accurate, permanent markings on tools, parts, and equipment.
- Intricate Glass Engraving: Etching detailed designs and patterns onto glass surfaces.
- Personalized Gifts: Adding a unique touch to gifts with custom engravings.
- Jewelry Making: Crafting one-of-a-kind jewelry pieces.
Pushing the Boundaries: Advanced Techniques and Applications
As you gain experience, you can explore more advanced techniques. These include raster engraving, which creates images by scanning the laser back and forth, and vector engraving, which uses lines and curves to create precise shapes. Mastering these methods unlocks a world of creative possibilities. You can also experiment with different materials and finishes for unique effects. These advanced techniques elevate your DIY laser projects, allowing for increased detail and complexity.
Mastering Your Fiber Laser DIY: Troubleshooting and Beyond
Building a DIY fiber laser system is incredibly satisfying. But even the most carefully assembled systems can run into problems. Knowing how to troubleshoot effectively is key to keeping your laser performing at its best and maximizing its lifespan. This involves understanding not only how to fix issues, but also how to prevent them in the first place. You might be interested in: How to master...
Common Troubleshooting Scenarios
Several common issues can crop up with DIY fiber laser systems. Power fluctuations, for instance, can be caused by a faulty power supply, loose connections, or even a degrading laser diode. Beam quality degradation can be the result of a misaligned or dirty focusing lens, damage to the fiber optic cable, or problems with the galvanometer system that steers the beam. Control system errors are another frequent problem, often stemming from software glitches, incorrect wiring, or issues with the microcontroller. Addressing these issues requires a systematic approach.
Systematic Troubleshooting: A Step-by-Step Guide
Effective troubleshooting starts with a methodical process, not random guessing. First, isolate the problem. If you're seeing inconsistent marking, for example, test a different material to eliminate material-specific problems. Next, check the obvious. Are all cables securely connected? Is the focusing lens clean? These small things can have a big impact. Then, move on to more in-depth diagnostics. Use a multimeter to test voltage and current for power fluctuations. Examine the beam profile for distortions if you're having beam quality issues. Finally, consult online resources. Many forums and online communities focused on DIY fiber lasers provide invaluable troubleshooting tips.
Optimizing Your Fiber Laser DIY System: Going Beyond the Basics
Once your system is working correctly, optimization can significantly improve its performance. Beam quality refinements, like fine-tuning the focusing lens or adding a beam expander, can dramatically enhance precision. Efficiency adjustments, such as optimizing the cooling system or tweaking the laser’s pulse width, can extend the life of your components. Like a well-tuned engine, a well-optimized fiber laser runs more smoothly and lasts longer.
Preventative Maintenance: Staying Ahead of Problems
The best way to handle problems is to stop them before they start. Regularly monitoring key parameters, like laser power output, beam profile, and operating temperature, can help identify potential issues early. Think of it like regular maintenance for your car – oil changes and tune-ups prevent bigger, more costly repairs down the line. Simple steps like regularly cleaning the focusing lens and checking cable connections can prevent performance degradation.
Transforming Good Results Into Exceptional Ones
The difference between good results and outstanding results often lies in the details. Small changes to parameters like scanning speed, power output, and focal length can make a huge difference in the finished product. It’s like a photographer adjusting aperture and shutter speed for the perfect shot. Experimentation and close observation are key to unlocking your fiber laser’s full potential. By understanding your system’s intricacies and applying these optimization techniques, you can achieve professional-quality results.
Ready to elevate your laser projects? Laser Insights China offers a wealth of resources, from technical guides on DIY fiber laser welding machines to expert interviews on the latest in laser technology. Visit them today to explore the forefront of the laser industry.
